Bone broth is one of the fastest growing trends in the health food industry over the past two years.
For good reason!
The benefits of bone broth include (source):
- improving your immune system function
- healing gut and digestive issues
- helping with food allergies
- possible help with autoimmune disease symptoms
- providing important minerals and electrolytes
- supporting joint health
- improving circulation
I was first introduced to bone broth when my acupuncturist recommended I drink a cup every day. I was seeing her to help with my endometriosis symptoms and fertility, and she explained how my constitution (cold hands and feet, very low blood pressure and a blood stagnant condition with the endometriosis) could be improved by decreasing raw salads and increasing my consumption of cooked veggies and bone broth.
I figured I would give it a shot.
Now I’ve never been a big fan of broth itself or broth-based soups. It was a stretch for me to find a way to use the bone broth and enjoy it.
It was also a challenge to find one in the stores I enjoyed and I trusted.
So I decided to make my own.
I have been making it once or twice a month for almost a year now and have fallen in love with the taste and the comforting feeling I get when sipping on a warm mug of homemade broth.
One important thing to note is that there is a difference between stock and bone broth. Stock is typically simmered for short periods of time. Bone broth is simmered for anywhere from 8-48 hours, which results in more of the nutrients being pulled from the bones.
It is the bones that hold the benefits you receive when drinking bone broth, so you need to let them simmer in the liquid for as long as possible.
Many people ask me how to use bone broth. I personally love to sip on a mug with a light lunch (especially on cold or rainy days!). I’ll make a roasted veggie salad or some eggs for lunch and have my bone broth on the side. My daughter loves it as well, so I’ll pour her a small mug to enjoy with me.
You could also use it as the base for other soups or stews and it would be just as delicious.
I’m including my own personal recipe below, but this can be changed depending on your tastes. The most important thing is finding good quality bones to use. I personally prefer beef bone broth, as I don’t eat much red meat and it’s a chance for me to enjoy some of these nutrients. We also have a local store that sells organic, grass-fed beef femur bones cut up. I love that I can contribute to using the entire animal and not letting anything go to waste!
You can just as easily roast a chicken and use the carcass if you prefer. Just make sure it’s organic and you are using the highest quality bones you can buy.
I hope you decide to try this amazing bone broth! It will get you out of your comfort zone for cooking and will give you such a sense of accomplishment and sustainability in the kitchen.
It will also make your belly very happy :).
Easy Homemade Bone Broth
Ingredients
- 1-2 pounds organic grass fed beef femur bones or organic free range chicken carcass
- 3 large peeled carrots
- 4 large celery sticks
- 1/2 medium onion
- salt
- pepper
- apple cider vinegar optional
- lemon juice optional
- water
Instructions
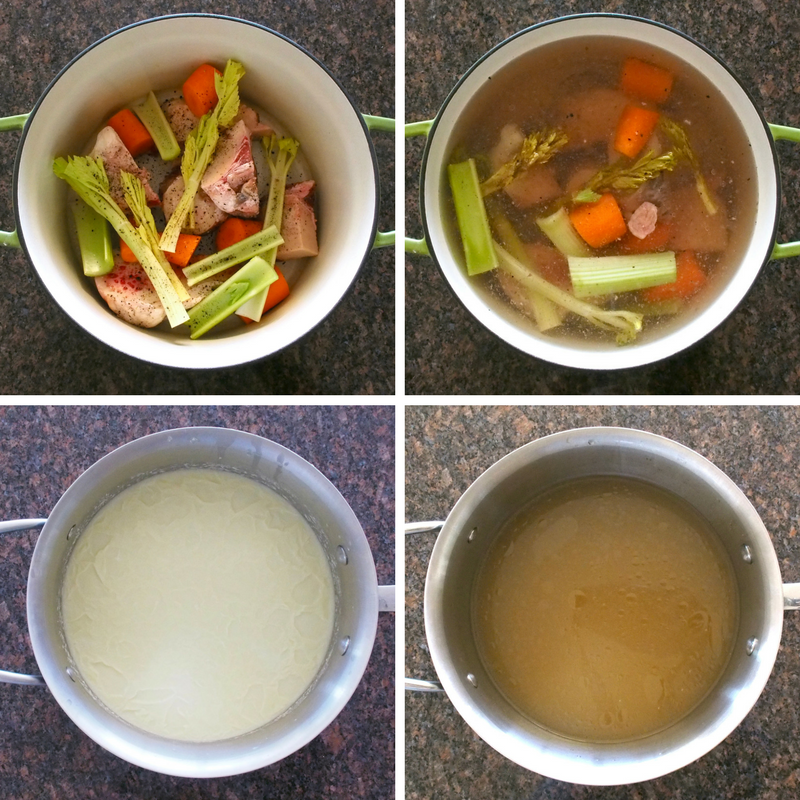
- Preheat your oven to 400 degrees
- Place the bones, carrots, celery and onion in a large, oven safe soup pot
- Sprinkle with salt and pepper
- Place uncovered in the oven for 15 minutes (this roasts the ingredients slightly and gives a little more depth of flavor to the broth, but it’s not necessary)
- Remove from the oven and fill the pot with filtered water until all ingredients are submerged (I go about a 1/2 inch above the ingredients)
- Add 2 tablespoons apple cider vinegar if you have it (supposedly this helps draw the nutrients out of the bones – I’ve done it both with and without)
- Bring to a boil on the stovetop and reduce to a simmer
- Simmer for 8-24 hours, skimming the scum off the top as it rises
- After your desired simmering time, let the broth cool to room temperature
- Drain the broth and discard the bones and veggies (I usually just drain into a smaller stock pot)
- Place in the fridge overnight
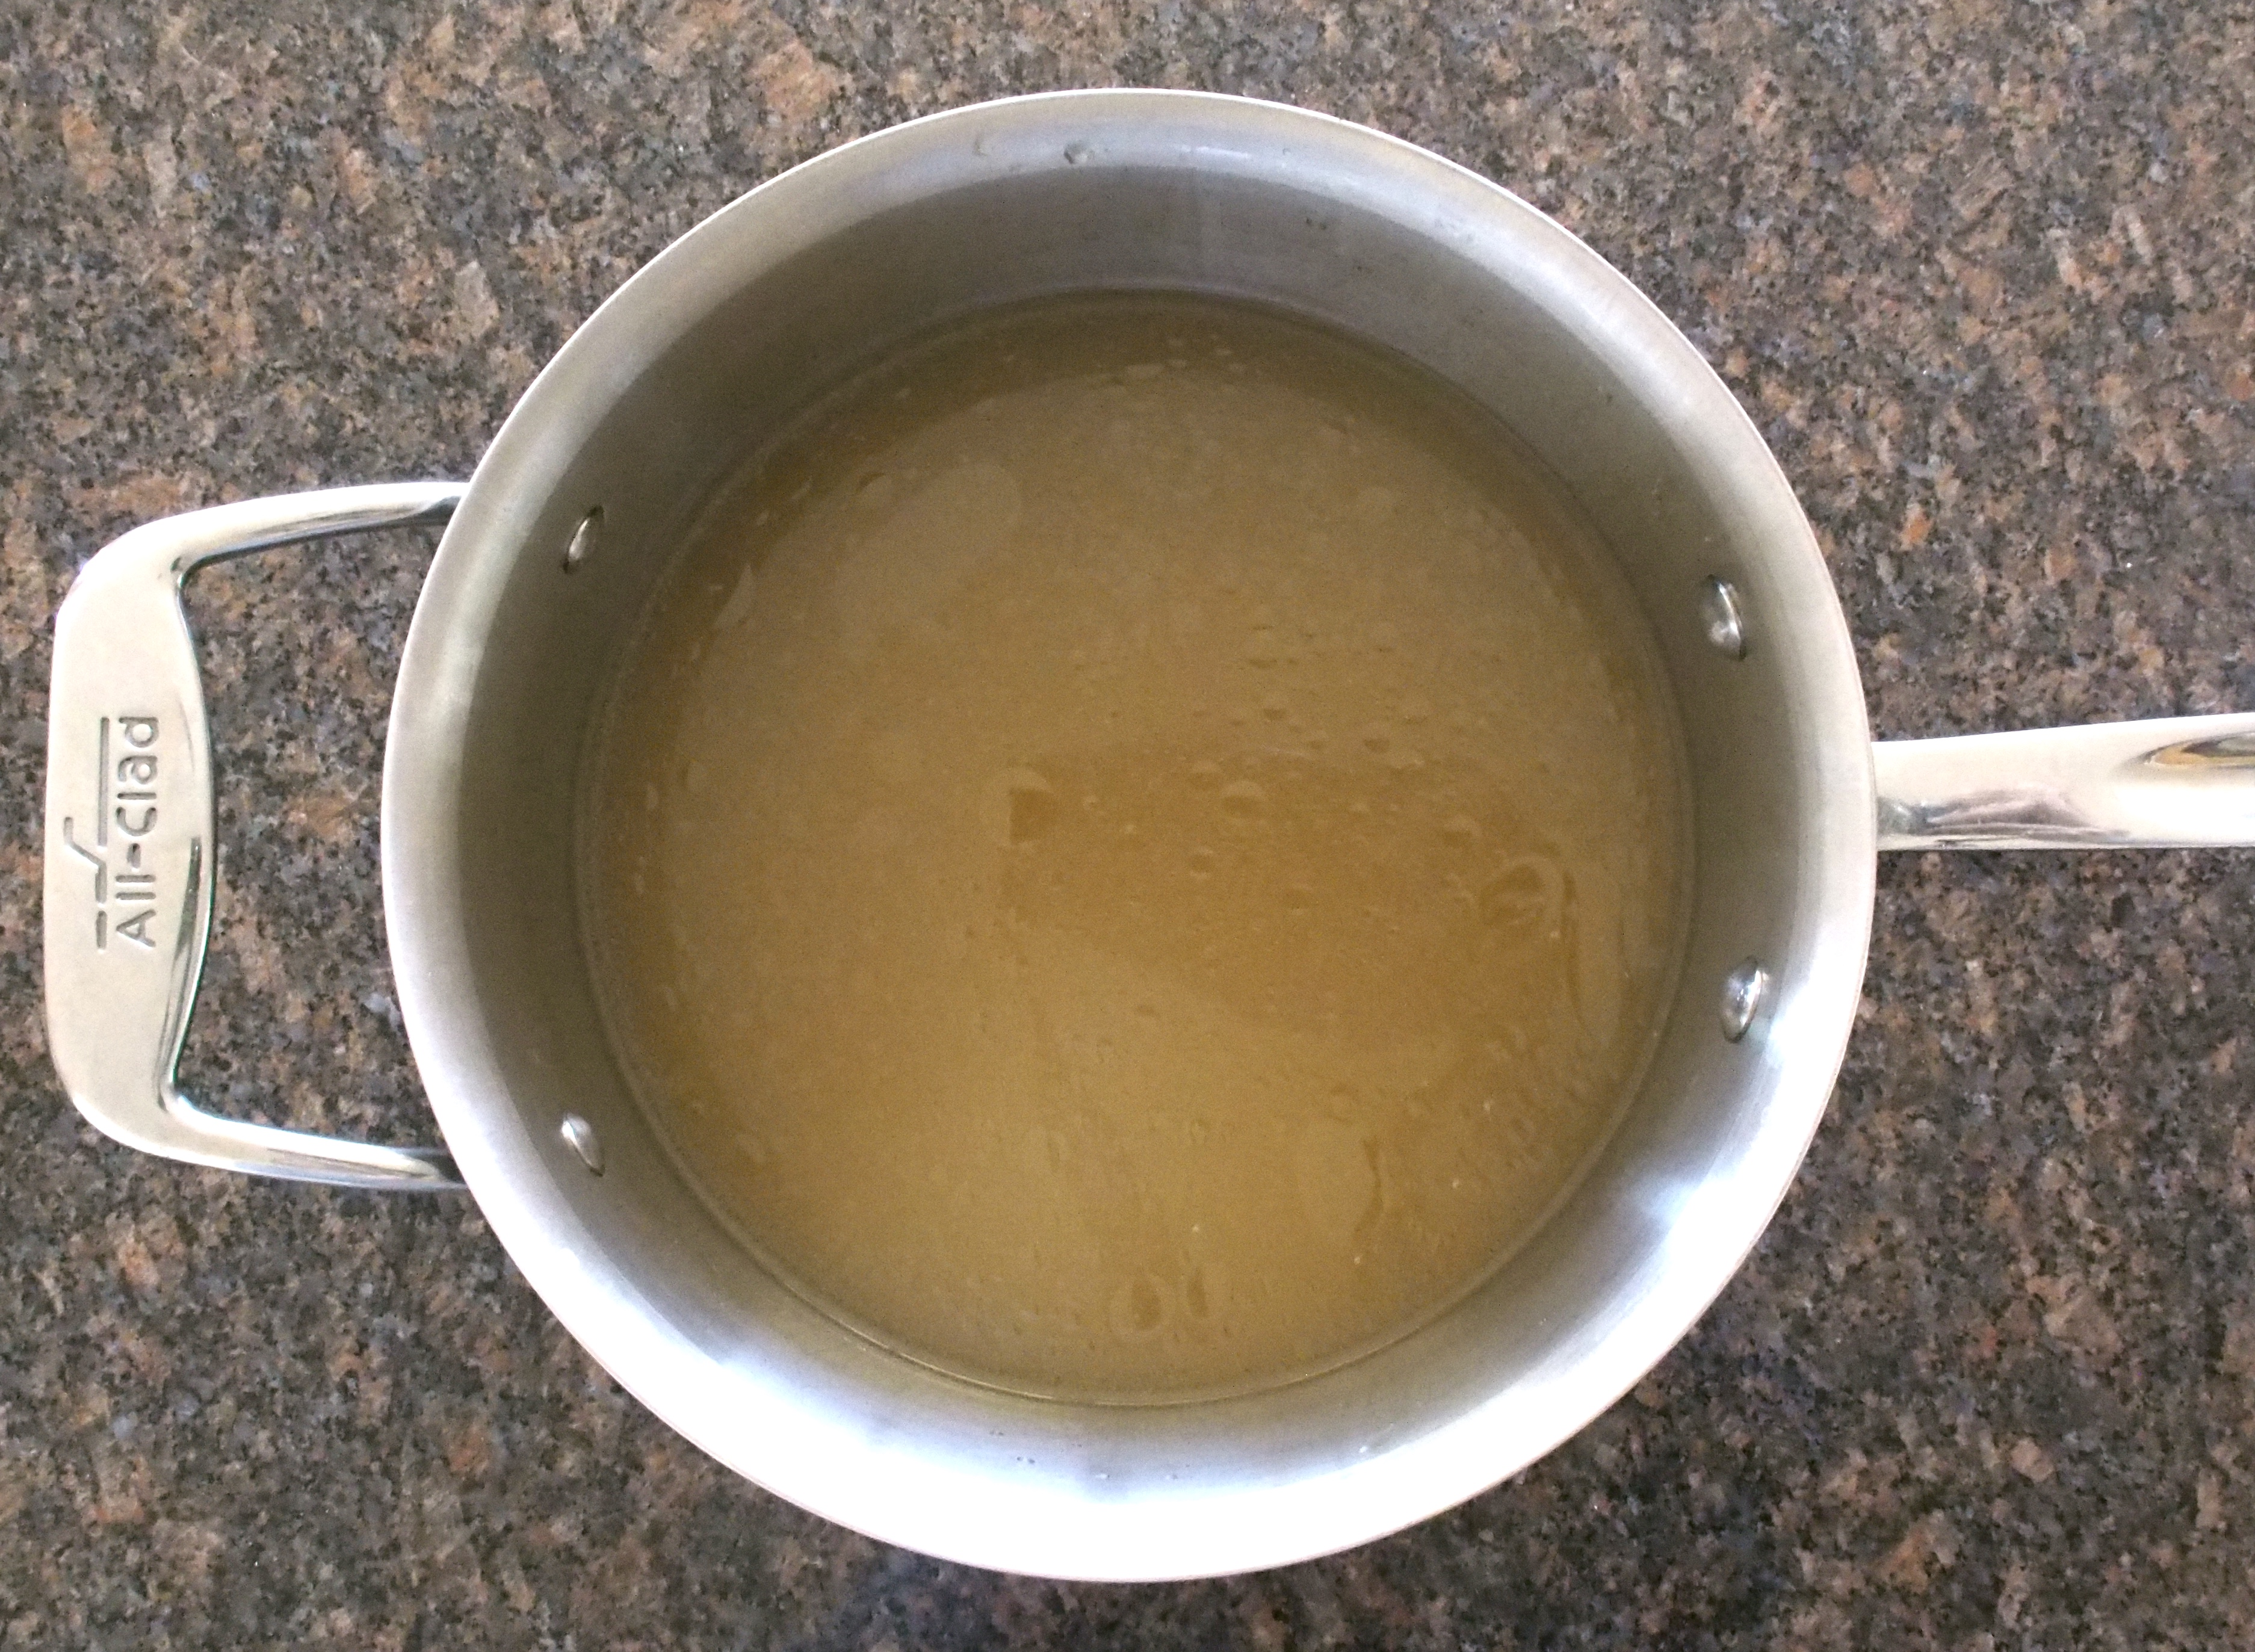
- The next day, skim the fat layer from the top of the broth
- Add the juice of 1/2 lemon and salt and pepper to taste
- Store in an airtight container in the fridge for five days or the freezer for 3 months